-->

Explosive Trap -- Sometimes I'm Wrong


I was recently updating the Survival guides over at the Warcraft Hunters Union, and I saw that there was some disagreement about the optimal use of Explosive Trap in single target fights, when I realized there was a bit of disagreement in the hunter community.  So I pulled up my spreadsheet, and downloaded the latest build of SimC, and set to work.

Here was my side of the argument:  Arcane does more damage per execute (by execute, I mean each time you cast it) than Explosive Trap, so the only time Explosive Trap should be a higher priority is if Explosive Shot is about to come off CD, and you don't have enough focus to cast both an Arcane and an Explosive Shot.  This method uses Exp. Trap as a sort of filler, when you need something to do for a GCD, but are a little short on focus.  However, while I was thinking about focus in a general since, I wasn't looking closely enough about how the focus costs were affecting the entire fight.

Especially as we get into higher gear levels and Steady Focus becomes more and more productive than Thrill of the Hunt, we'll be seeing a lot more of those 40 focus Arcane Shots.  That's a pretty huge focus cost, especially when compared to Explosive Trap (which is free).  After tearing through some logs, and running some simulations on SimC, I've come to believe I was wrong before about Explosive Trap usage, and here's why:

While it is true, in any given instance, one Arcane Shot does more damage than the entire duration of one Explosive Trap, the amount of time you'll have to spend casting Focusing (or Cobra) Shots negates any DPS gain from casting Arcanes instead of Exp Traps.  

For example, in a 7 minute fight (actually, about 100,000 seven minute (give or take 20 seconds) fights averaged together) if I only cast Explosive Trap as described above, I'll end up with about 9 Explosive Traps, and 137 Arcane Shots.  If, instead, I cast Explosive Shot basically on CD (other than when it gets in the way of more important shots) I end up with about 34 Explosive Traps but only 125 Arcane Shots.

So, at the most basic level, I'm looking at a decision between 18 extra Arcane Shots (plus a few focusing shots), or 25 extra Exp. Traps.  At 23596 per Arcane, 12584 per Focusing Shot (which is about 5763 per second), and 19110 per Exp Trap, we've got a fairly simple comparison.

Using Exp Trap selectively:
18*23596 + 5763*7 = 465069

Using Exp Trap on CD:
25*19110 = 477750

And that's what finally convinced me I had been wrong.  Because you can't simply replace the GCD you would have used on the Exp. Trap with an Arcane Shot (since you'll have to make up for the focus cost of the Arcane with more Focusing Shots/Cobra Shots), using Explosive Trap on CD yields higher DPS.

The Lone Wolf Consideration

It's worth noting that these numbers are incredibly close together, and that's because Focusing Shot does some amount of damage.  If you take Lone Wolf (which doesn't have as high of a DPS potential as Focusing Shot, but may be preferable in heavy movement fights), the damage of each Arcane goes up, but, we have to spend even more time casting Cobra Shots, since they don't return as much Focus as Focusing Shot. So in the end, we only end up getting 7 more Arcane Shots, compared to 24 more Explosive Traps from using them on CD; so we still end up DPS ahead by using Exp Trap as often as we can.  

Good Times and Survival PvP


I can't really explain how much fun I'm having playing Survival in arenas right now.  I suppose it starts with the last two seasons of pretty much just Marksmanship in PvP, and then before that in MoP playing pretty much just Beast Mastery, so it's nice to complete the circle with something that hasn't been great for PvP in a couple years.  But there's definitely a lot more to it, a synergy with the new talents and abilities, as well as the other changes in Warlords.

So Much for Reduced CC

Wasn't there supposed to be reduced CC in Warlords?  I feel like that was on of the big changes for PvP.  Anyhow, I'm definitely spending just as much time in unavoidable stuns as I used to, but I can make up for it with some greatly improved CC of my own, in the form of 12 sec CDs on traps. Match that with the 2 piece set bonus, that's 50 additional focus every 12 seconds.  Couple it with Glyph of Explosive Trap for knockback, and we essentially have an interrupt every 12 seconds (or just a really awesome tool for kiting).

Sure, we did lose out on Scatter Shot, but I'm really not missing it.  Instead of scatter trapping, I've just been focusing on better communication with my healer.  Since there nearly always seems to be a Melee on my healer (and let's face it, Ret Pallies, Frost or Unholy DKs and Feral Druids are all looking great), I can just throw a Freezing Trap somewhere easy to run through, and with that extended engagement radius, freeing up my healer is getting even easier.  As for casters, while scatter-trapping was nice and simple, the threat of a trap is often enough to at least act as a great interrupt. They have the choice of interrupting themselves, or eating a trap.

And that's just two traps, I've still got good ol' reliable Binding Shot or Wyvern Sting (though I have to admit, I'm not enjoying the cast time on Wyvern).

I love DoTs

One of the nice little comforts of Hunters before now, is all specs had a baseline DoT in Serpent Sting. After playing a good bit of MM in arenas over the first couple weeks of the season, with no DoTs (other than perhaps Crows), it's so nice to play a DoT spec again. Many times over the last week or two, I've thought to myself something like: "Damn, I thought I was gonna be able to get the kill, but he line-of-sited me" only to be pleasantly surprised when I see DoTs continue to tick them down, securing the kill. Several times I've actually made that comment out-loud, leading to plenty of grief from my healer in vent. :-P

And we're not just talking about one or two DoTs anymore. We've got Serpent Sting (recently buffed), Black Arrow, a Murder of Crows, Poisoned Ammo (or Frozen), a substantial (even if only 4 seconds) Explosive Shot, and the option of Explosive Trap (if it's not glyphed).  I don't care how good they are at hiding around pillars, if I get up all my DoTs, you're not gonna hide for long.

That's really the biggest contribution to my enjoyment of Survival PvP right now. I've never been the best at playing the pillars, so being able to switch my focus from "get somewhere where I can pump out damage" to "get up your DoTs before they hide again" has been a fun switch.

Survival in Ashran

Overall, I feel like Ashran is a pretty embarrassing failure for blizzard.  Set aside the 2-4 hour queue for a "world PvP zone"; the mixture of lack of explanations of the zone and incredibly over-powered zone buffs makes it unplayable for the unsuspecting, and basically god-mode for everyone who knows how to get the buffs.

Of course, as someone who spends as much time studying as I do playing the game, once I pick up all my buffs in Ashran, I am a PvP god. I picked up the Sharpshooting Guide, and paired that with the Disengage Guide (with post-haste), and I can easily hang back 40-60 yards from anyone while doing full DPS to them.  Yesterday while in Ashran I, through sheer luck apparently, came across a half dozen Song Flowers too, which just made things all the easier.  Then, and I actually still don't know where these buffs came from, but I had a 20 minute buff that gave me random procs of huge jumps. As a survival hunter I spend a great deal of my time jumping anyway, but with this, I was untouchable.  I also managed to pick up a ton of those random scrolls, but haven't had a need for them yet.  

If I was facing people without the buffs, I could easily 1v3, probably could handle 1v4 unless there was a good healer in the group (bad healers couldn't keep up with the damage buffs and the heavy movement).  If I ran into a group that all had similar OP buffs, then we'd just move on to other groups, since it took way too long to kill each other.   Anyhow, not how I want my PvP to generally be, but once every few months or so, it's nice to be insanely OP.

A Couple Complaints

As much as I'm enjoying the play-style of SV in general right now.  It still really hurts to not have a baseline CD or execute.  The way it's set up currently, SV would be really overpowered if we got back Kill Shot, but unfortunately, that means a lot of the time we're going to be playing a sort of support roll in Arenas.  We basically seem to be resorting to keeping up pressure with DoTs and focusing on CC, then waiting for the other DD to finish them off.  

Last week I was able to run 3s as SV/Ret Pally/Healer, and SV/Frost DK/Healer. both seem fairly viable (though the Frost DK wasn't quite geared up enough to tell).  I'm looking forward to trying some runs with a Feral Druid and an Unholy DK.  

Unfortunately, there aren't many hunters very high up on the 3v3 PvP Ladder.  As of me writing this, there are 4 in the top 50 (compared to 12 Druids, or 8 Pallies),  2 Beast Master closest two the top, and 2 SV, rounding out the bottom of the top 50.  I'm not the biggest fan of BM PvP, though I might give it a try after I finish my SV set, and can focus more on a different build for BM.  

The Greatest of Hunter Zones


After spending too much time writing about math, I thought it'd be nice to write about something a bit more fun.  Check out my take on the best hunter zone in Draenor, now up at the Warcraft Hunters Union.

ToTS: Stacking Bestial Wrath with Focus Fire


The following is a repost of an blog post I did here a few months ago (back in the Warlords of Draenor Beta) with some edits to bring the information in line with the latest buff to Beast Mastery Hunters; as it's likely more hunters will be hoping to make the switch back to BM (even if it remains a bit lower for single target DPS).  

There's been a bit of disagreement in the hunter community about the proper use of Focus Fire in Warlords of Draenor, where it now includes an Attack Power buff of 5% per stack of Frenzy consumed. And since having a blog means I get to express my opinion about things, I thought I'd take a minute to go over the new mechanic, and what it means for our rotation as BM in WoD.

For our example, I'll be looking at the numbers from a level 100 BM hunter with run-of-the-mill 667 ilvl gear.  When testing, I was around 42% mastery, 30% crit, 14% haste, 16% multistrike, 4% Versa, and a little over 5000 AP.

The issue I'm looking at, primarily, is when Focus Fire should be used, relative to Bestial Wrath.  So for most of our work, we'll only look at abilities that are used during BW, and then compare the benefit we get from using the two abilities separately, to using them together.

Bestial Wrath and Focus Fire Stacking Damage

To start off, lets look at the damage our abilities are doing under different circumstances.

KCMeleeClawArcaneAutoShot
w/ 5 Frenzy15484.52097.14561.18066.55274.8
w/ BW18581.42516.55473.38873.25802.3
w/ Focus Fire17033.02306.85701.48687.66291.8
w/ FF&BW23226.83145.76841.710583.96921.0

What you're seeing here is the effect of multiplicative buffs.  If an unbuffed Kill Command does X damage, then during Bestial Wrath, it will do X*1.2 damage; during Focus Fire, it will do X*1.25 damage, but during both effects, it won't do X*(1.45) damage, instead, it will do X*(1.2*1.25).  In the end, that only works out to 5% extra damage.  Furthermore, considering that you'll be stacking other buffs around Bestial Wrath, and you'll be saving focus so you can use all damage dealing shots during BW, that extra 2% will work out to even more total damage.

The next part I'd look at is how often we can use each ability.  For cast abilities, this doesn't change.  I can always use 2 Kill Commands, 1 Barrage and 5-6 Arcane Shots (assuming I've managed my focus correctly, and do not use Cobra Shot or Focus Fire during BW) and my pet  should, on average, cast 3 Basic Attacks: Smack, Bite, or Claw (this is an average because of the BM Perk which lets your pet reset the CD on its Basic Attack).  

Attack Speed and Haste Effects

Two abilities we'll use during Bestial Wrath, however, are affected by Attack Speed: Pet Melees, and Auto-Shots.  

Pet MeleeAuto-shot
Unbuffed Cast Frequency1.662.65
Casts during BW w/ 5 Frenzy7.23.8
    "    "    w/ FF w/ 0 Frenzy6.04.9
    "    "    w/ FF w/ 1 Frenzy6.34.9
    "    "    w/ FF w/ 2 Frenzy6.54.9
    "    "    w/ FF w/ 3 Frenzy6.74.9

Looking at that chart, two differences immediately pop out in my mind when comparing the first two rows: with Focus Fire we have an extra Auto-shot, while with Frenzy we have an extra Pet Melee. We can then look up to our first chart to see what damage that difference will net. 

With 5 stacks of Frenzy and Bestial Wrath, our one extra Melee is worth (on average) 3145.7 damage; that is to say, by using Focus Fire, we lose that full amount.  However, our Melees in general are worth a little bit more due to the FF AP buff: about 629.2 damage more.  Since we'll still have six Melees, we can multiply that 629.2 by 6, which we'll subtract from the 3145.7 we've lost. That gives us, already, a net gain 629.5. On top of that, we'll also get an extra Auto-shot, and all of our auto-shots will have the extra bonus of benefiting from the FF AP buff**.  An entire Auto-shot with FF and BW (which averages 6921.0 damage) plus the difference between 4 other Auto-shots during BW, with and without the FF buff (1118.7 damage each) gives us a +11,395.8 damage.   Combine that with our pet melee gain of 629.5 due to the Attack Speed buff from Frenzy, and we're at a net gain of 12,025.3 damage.

That might not sound like much, but that is only covering the difference in damage of Auto-shots and pet Melees.  We'll also get an extra 5% out of our Kill Commands, Arcane Shots, Glaive Toss and our pet's Basic Attacks, which would vanish if we used the two abilities separate (that is the bonus from the buffs multiplying).    

The Ideal Placement of Focus Fire

But we're not even done yet. There's still another thing you can do to increase you net damage gained. Because the Focus Fire buff lasts for 20 seconds, if we use it 10 seconds before using  BW, our pet will have three 40% chances to build up Frenzy stacks again before we hit BW.  That's only a 6.4% chance of getting up to three stacks before BW, but a 78.4% chance of getting at least one stack, and a decent 35.2% chance that you'll get two stacks before BW***.  

Another benefit of using Focus Fire at this point, is that you'll be wanting to cast some cobra shots before BW to build up focus.  Using Focus Fire at this point allows you to cast those significantly faster, allowing you to spend more time on harder hitting shots, while still pooling the appropriate amount of focus.

Conclusions & Considerations:

Now that Focus Fire represents a larger damage increasing cooldown than Bestial Wrath, there is more legitimacy to the method which would tell you "use it as soon as you get five stacks of frenzy, no matter what".  The reason being that occasionally, you will get really good RNG and end up with lots of Focus Fires. This is fine if you're goal is to get top parses, but is inadvisable when working on progression.  As XKCD demonstated in the comic at the top of this post, Post Hoc Ergo Propter Hoc is not a valid argument for how we do things.  The vast majority of the times, stacking the two cooldowns will provide the greatest DPS increase, and will provide much more reliable DPS, that won't depend as much on RNG.

That doesn't mean, that we shouldn't take advantage of good RNG when it comes along, though. With a little luck, you'll be able to use Focus Fire twice every minute.  Once 10 seconds before BW, and once about 0-10 seconds after it falls off.  If RNG isn't on your side, it's best to wait until 10 seconds before BW to use it, though.  


Notes:

 *Note that Frenzy does not affect the damage of a shot, only the attack speed, so in this case, this line can be seen as our average damage of each ability, unbuffed.


**It may be worth mentioning that a 10% buff to AP works out to be about an 19.28% buff to an ability which uses Weapon Damage as it's base multiplier, in the gear I wore for testing. That is to say:

The Weapon Damage multiplier = WD + (2.8 * (AP) / 3.5)
 
(1191+(2.8*1.25*5023/3.5)) / (1191+(2.8*5023/3.5)) = 1.1928

That percent change will be different, however, depending on the ratio of your base WD to AP.


***These numbers are actually a bit higher, thanks to the Draenor perk Enhanced Basic Attacks, which gives each basic attack a chance to proc a second, focus-free basic attack, which gives you an additional 40% chance to proc a stack of Frenzy.

Balancing Hotfixes


There have been a few hunter changes over the last week for balancing purposes:

Beast Mastery:

  • Improved Focus Fire now grants a 5% increase to AP for every stack of Frenzy that had been consumed. (Dec 15)
  • Kill Shot's damage has been reduced by 10% (Dec. 3)
     

Survival:

  • Serpent Sting's damage has increased by 60% (Dec 15)
     

Marksmanship:

  • Aimed Shot's damage has been reduced by 10% (Dec 3)
  • Kill Shot's damage has been reduced by 10% (Dec 3)
     
We've had a week to play with the MM nerfs, and overall, they seem fair. We were doing really well on single target fights, and this wasn't enough to make us bad for single target, but we're slightly closer to the rest of the pack.  

As for the other two specs, this will hopefully put them more in line with the rest of the classes.  The Serpent Sting buff only represents about a 5% single target buff for SV, which won't be enough to bring it in line with MM single target, but it will be a much more significant buff to SV AoE.  

The Focus Fire change, is frankly, huge. This will have fairly huge implications for PvP, as an already fairly bursty spec will be have even more to stack. It's also going to represent a significant buff to both BM AoE and Single Target in PvE.

Thrill of the Spreadsheet: Glaives Vs. Barrage

Edit:  With the hotfixes announced 12/8/2014, much of this information has quickly become outdated.  Aimed Shot recieved a 10% nerf (as did Kill Shot).  As soon as I have more logs, I will revisit this issue, and, if needed, post more info on this blog.


On the Hunting Party Podcast yesterday, we briefly touched on the choice between Glaive Toss and Barrage on Single Target fights.  I think I've briefly covered this, to some extent, but I wanted to get into it again just to have all my thoughts collected in one place.

The crux of the argument I'm trying to make in favor for Glaive Toss is this:
While compared in a vacuum, Barrage does more damage than Glaive Toss, and does more Damage/Cast-time than Glaive Toss.  However, when you compare the opportunity cost, that is to say, how much time you'll have to spend casting Steady Shots to make up the focus cost, or what you could have spent with that same amount of focus, Glaive Toss ends up being the better choice.  
To get to that conclusion, I want to take a look at one of my logs from last week.  In a single target fight (against the Butcher), the value of my Glaives and Barrage looks like this:

Tick/HitCrit TickPer cast ave:Focus CostCast/GCDDam/CTDam/FocusDam/CT/Foc
AiS22359.151751.531176.82442.2114107.16708.56320.62
AiS w/ TotH22359.151751.531176.82242.2114107.161299.03587.80
AiS w/ CA22359.151751.548812.26322.2122087.001525.38690.22
AiS w/ TotH&CA22359.151751.548812.26122.2122087.004067.691840.58
Barrage2495.65506.554381.92602.6620444.33906.37340.74
Glaive Toss5972.112405.817766.4315117766.431184.431184.43
Chim Shot36711.380655.566007.435166007.401885.931885.93

If you're curious where those Aimed Shot focus costs came from, I had about a 30% crit chance, so without Careful Aim, I should have 30% of my Aimed Shots cost 30 focus (because the crit returns 20 focus), and 70% cost 50 focus. I used the same averaging technique with Careful Aim, but with 90% crit chance.  

Considering Barrage

What I've tried to do in this spreadsheet is control for the focus cost of a shot, by not just looking at Damage per Cast-time (or DPS, however you like to think about it) but looking at Damage per Cast-time per Focus. As I've mentioned before on this site, this creates a simple metric to compare focus-costing shots by both their damage and their opportunity cost in resources.  

From this sheet, we see Chim Shot is the clear winner, as we expect, even during Careful Aim while TotH is up, we're getting the most "bang for your buck" from Chim Shot.  But that's not really what was in question here.  What we're trying to look at is the comparison of Glaive Toss to Barrage. The trouble with barrage, is in this scenario, it's focus cost is so high that it's only doing better than one ability, which is Aimed Shot with no Careful Aim and no TotH buff.  There's no question then, that Aimed Shot during Careful Aim is more valuable than Barrage, but also, when you consider, I had TotH up, on average, 64.32% of the time, Aimed Shot without Careful Aim is still, on average, a more valuable ability than Barrage.  This puts Aimed Shot above Barrage on our ability priority list. 

The reason this is important is because once an ability with no CD is higher on our priority list than another ability, then we'll never get to the lower ability.  And that is really what the pro Glaive Toss argument relies on, it's not that Glaives is necessarily better than Barrage on it's own, it's that Barrage isn't as good as Aimed Shot.  That's the result of having a really powerful focus dump, that's further buffed by Lone Wolf.  

Considering Glaive Toss

As you can see in the spreadsheet above, because Glaive Toss has no cast time and a low focus cost, its value (when measured in dam/ct/focus) is relatively high.  Higher, in fact, than Aimed Shot in all but one situation (Careful Aim while TotH is up).  In addition, it's DPS is higher than Aimed Shot without Careful Aim, and not significantly lower than Barrage.

But that's not the only benefit of Glaive Toss.  One of the harder to quantify benefits is that it is a single GCD ability in a sea of cast-times.  I mentioned above that no matter what, Chim Shot is at the top of our Priority (yes, it does more damage on average than Kill Shot, also, but that's really for a different discussion), and that means we want to use it as close to on CD as possible.  With Glaive Toss we have an opportunity to use it as a "filler" shot in our rotation.  That is to say, if I only have a second left before Chim Shot is off CD, if I choose to use Barrage, then I either have to use Aimed Shot, delaying Chim Shot by 1.2 seconds,  or I can just sit there twiddling my thumbs for an entire GCD until Chim Shot comes off CD.  With Glaive Toss, however, we have a low focus cost, instant cast ability to fill in those occasional little gaps in our rotation.  

Another Metric 

Though I'm a big fan of Damage per Cast-time per Focus, there are other ways to think about the value of our abilities.   One way to consider this particular problem, is what we could do with the same amount of focus.  Barrage, for me, did 54.4k damage, and costs 60 focus. Using that same focus, how many Aimed Shots could I have cast?  Assuming we're already decided that we wouldn't use Barrage during Careful Aim, we can just look at the cost of Aimed Shot outside of Careful Aim.  With, as I mentioned above, a 64.32% up time on TotH, we can say Aimed Shots cost 24 focus 64% of the time, and 44 focus 36% of the time.  That means on average, when Careful Aim isn't up, we spend 31.2 focus per Aimed Shot.  So basically, we could do two Aimed Shots for the same focus cost as one Barrage.  And as we see above, two Aimed Shots provides us with about 10k more damage.  

Another way to think about it is using a Glaive Toss + Aimed Shot comparison.  At 15 focus per GT and 31.2 focus per Aimed Shot, we can cast one glaive toss and 1.44 Aimed Shots,  for a total of 62.7k damage, also well out damaging Barrage.
  

The Caveat

There is a caveat here, that is certainly worth considering, that Barrage is more valuable than Aimed Shot without Careful Aim or TotH.  The reason I bring this up again, is that even though the average Aimed Shot is more valuable than Barrage, we don't deal with averages in the game. That is, TotH isn't always 64% up,  it's either up or it's not.  

So because of this, there is a time when the in-game application of Barrage is more valuable (measured in Dam/CT/Focus) than Aimed Shot, and since it will do more D/CT than Glaive Toss, I think we've got to consider this as an viable talent.  

In this situation, instead of trying to use Barrage on CD, we would only use it when (TotH isn't up, and Careful Aim isn't up), which may end up netting us more total damage than not using it at all.  This also provides the added benefit of having a high focus cost shot, which is more likely to proc more TotH's, which is especially valuable because you're only using it when TotH is down, giving you the full three stacks.  

In this case, our shot priority would look like this:

  • Chim Shot
  • Kill Shot
  • Aimed Shot w/ TotH & CA
  • Aimed Shot w/ CA
  • Aimed Shot w/ TotH
  • Barrage
  • Aimed Shot
  • Steady Shot (to rebuild focus)

Unfortunately, at this point we've gotten into too many variables, so we can't easily compare the two abilities using spreadsheet math.  We'll have to turn to our handy DPS simulators, to see if we can get some definitive answers, when comparing these two abilities.  For now, I'll be sticking with Glaive Toss for single target, but I'll be very interested to watch hunters who are using Barrage, and see if they find a way to pull more DPS out of it.  

Huntering 101: The Pit


Back when the Timeless Isle was fresh and new (before over a year of doing it, that is), I started some really basic guides for newer hunters, that covered how to solo things that were't to the level of "extreme soloing", but at the same time, weren't things that your average wow player could do either.  So in that vain: in guild I keep getting people asking me to group with them to do The Pit Apexis Crystals daily, and when I was first asked, I was quite surprised, for one because I hadn't noticed it was supposed to be a group quest, and also, I don't know why anyone would want to share their Primal Spirits.

So, for recently boosted hunters who are looking for a good practicing spot to work on their soloing in a safe-ish environment, or lower ilvl hunters looking to have a great place to farm Primal Spirits, here below is how to get by in The Pit.  This guide is aimed at hunters between 600 adn 630 ilvl; around 630 or higher this will become fairly trivial, and you'll be able to just zerg through most of the mobs in this zone.

Talents

You can choose any Hunter spec you want, as they'll all do fine here.  I go with marks, because it's got the best single target DPS, which helps you burn through everything a bit faster.

The important talents include Posthaste, Binding Shot, and Spirit Bond. Posthaste comes out on top, as there will be a few snares/roots that you'll want to break, and the main mob who casts it will do it a bit to often for Master's Call to do the job.  Plus it's nice to be able to run around a bit faster.  On the second tier I go with Binding Shot.  Wyvern Sting can be helpful, as you'll see below, because there are some packs of mobs that it'd be nice to CC both of them,  but I like having Binding Shot for those "oh shit" moments when you didn't notice the mobs on the ledge above you and pulled everything with barrage.  And of course, Spirit Bond adds some nice healing, which will generally keep you topped off (since you should only be taking unavoidable damage, the brunt of it going to your pet).

Less importantly, you can choose whatever you like from tier 60.  From the 75 talents I like Crows, since it will be resetting a lot, you can use it pretty much constantly.  Tier 90 is again, totally up to your preference, though using Barrage will take some planning, since it may break your CC.  And the final level 100 talents, I like Focusing Shot, but Exotic Munitions is fine too, if you don't like standing still.

For Glyphs, Glyph of MD is mandatory, as is Glyph of Mending (at least at lower ilvls).  I took Animal Bond for my third, though there are plenty of other viable options.  Glyph of Deterrence can be helpful at lower ilvls (I'll explain below).

In the minor glyphs, I like to keep the Aspect of the Cheetah glyph, so you can run fast without worrying about turning it off. The Play Dead glyph is great in other situations, but here there will be times when you want to drop aggro on  your hunter, but keep aggro on your pet, so I would avoid it here.
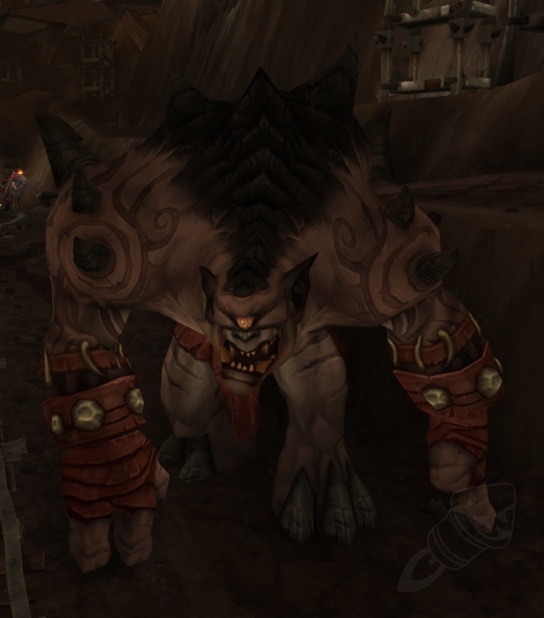
Irontusk Trampler

The Irontusk Trampler is the first mob I run into when I jump the fence to get into the pit.  You can find them on the southern, upper cliffs.  The only ability of note is Trample, which does AoE damage which around ilvl 610 or below will be a bit much for Spirit Bond to keep up with.  You should be able to safely just soak one of these, and if he isn't dead by the time he's casting a second, you can just step back out of range until it's safe to DPS again.  Other than that, the hunter should take no damage while fighting him, and will only have to keep Misdirect up on your pet, and/or keep growl on. 

Iron Laborer

The Iron Laborer has the lowest health of any of the mobs you'll see.  They are not elite, and have no abilities that will give hunters a problem.  They do tend to hang out in long lines, and if you pull enough, their damage can be too much for Mend Pet to take care, so at low ilvls, pulling two or three at a time is a good idea.  Around 620+ ilvl, you'll be able to pull the entire pack of them and just AoE them down (especially if you're doing this as BM).  

Iron Warden

The trouble with pulling large packs of Iron Laborers, is they usually have a supervisor, the Iron Warden.  This will provide good practice at selective pulling, though.  The Iron Warden will be riding a wolf, pacing back and forth watching the Iron Laborers,  at all of the spots where they spawn, however, the area where he turns around is far enough away from the laborers that you can pull the Warden safely.   If you do pick up a Laborer too, you should be able to just DPS him down, as they'll die pretty quickly.  Be sure to do so before focusing on the Warden, or their combined damage will quickly kill your pet.

The only ability the Iron Warden has that affects the hunter is called, Iron Shackles.  It's a Root with a DoT. However, since you're using Posthaste, just make sure to have your back toward a wall, and you can get out of this without taking any damage.  

Another basic hunter move that you can practice with this guy is quick CC and Rez Pet. Especially at lower ilvls, this guy's basic attacks can cause problems for your pet, and that's part of why I liked Binding Shot. Keep enough distance between your pet and you, and if you see your pet is about to die, throw up a binding shot at their location.  This will give you more than enough time to rez your pet, and get aggro off of you without having to reset the mob by feigning death.  Once your pet is alive and has gotten in at least one hit on the Warden, you can safely Feign Death to reset your hunter's aggro (though if you've been keeping up Misdirect the whole time, your pet should quickly regain aggro).  

Dealing with Packs

Around the southwest ridge of the pit, there are plenty of mobs to quickly finish the quest. The problem is, they generally are standing in packs of three or four; too many to safely pet tank, and with varied enough abilities that it's worth taking a look at how they work. These mobs include:

  • Iron Bloodburner: A blood mage that doesn't seem to do any damage that affects the hunter.
  • Iron Deadshot: a ranger/hunter with high damaging abilities, but very squishy. Needs to be burst down.
  • Iron Cauterizer: a healer which doesn't deal much damage, but will heal itself. Needs some amount of burst to kill, especially in lower ilvl gear.  Most abilities are interruptable.
  • Iron Bulwark: Possibly this is supposed to be the tank, they have health, but don't hurt much. Generally your least important mob, so you can focus on something else.
  • Iron Enforcer: These come with varied abilities; a stacking DoT, a deathgrip-type ability, and a bladestorm type ability.  Several stacks of the DoT can hurt quite a lot, even at higher ilvls. This is where Glyph of Deterrence comes into play, since it will reduce the damage done by the ticks by 50%, and allow time for the stacks to fall off (since they can't reapply while Deterrence is up).  Remember to set traps while Deterrence is up, since you can't DPS otherwise.
  • Gruesome Torturer: Often found alone, but sometimes in the packs.  He does a ground effect that you have to move out of, as well as a cone attack that will take 50-75% of your life if you don't avoid it; it does, however, have a long cast time, so this shouldn't cause any problems.
As you're camo'ing around, looking for easy pickings, you'll notice that some of them walk around between groups.  This is, of course, the easiest way to kill one, when it's all alone.  Most of the time, though, you'll have to CC one, and handle at least two.  If there is one in the pack, I always CC the Deadshot. They seem to do the most damage, and even though they die quickly, their damage can be too much to handle while other mobs are up.  The second choice for CC, if there's no Deadshot, is the Gruesome Torturer; he's not really a problem, but you have to pay attention, at least, so it's easier to just deal with him when he's alone.  If neither of those mobs are in a pack, then I CC the Cauterizer, but at that point you can probably just pull them all together.  

After CC'ing, I find it easiest to use the same CC priority list for my DPS first list.  So if I've CC'ed a Deadshot, and have a Cauterizer and a Bulwark, then I'll burst down the Cauterizer first, then finish off the Bulwark.  Especially with Rapid Fire or Bestial Wrath, you can generally burn through one of them pretty quickly, so you rarely have to worry about two mob's abilities at once for very long.  Again, this is a good opportunity to practice Binding Shot and Rez Pet, or a little bit of kiting to finish them off.  

Rares

You'll run into a lot of rares in The Pit (especially if you go during off hours).  These are designed to be taken on with five or more players; however, most of them are soloable in current gear.  

I'm not going to get into the specifics of each one here, but if you've gotten to the point where all of the regular elite mobs in the pit are no challenge at all, then it might be time to go perfect your kiting with these rares.  I haven't managed to kill (or even find) all of them yet, but the ones I have, all involved a fairly simple pattern of kiting with aggro on my hunter, and then using the glyphed Distracting Shot, so I can kite him with my pet (using the Moveto command).  

Of the rares I've tried, the hard part isn't really kiting them, but finding a path in which to kite them, where you don't pull lots of other mobs.

Bonuses

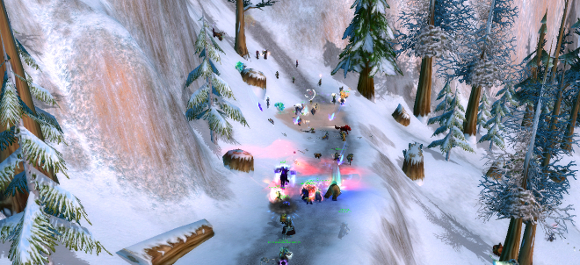
Somewhat similar to the Timeless Isle, there are several damage buffs you can pick up around the pit. An easy way to find some that seem to always be up, is follow the train tracks on the west side of the pit.  Eventually you'll see the break in them shown to the right.  You can easily just disengage across and grab a fire buff (adds fire damage to some abilities) and a really cool shoulder mounted rocket launcher.  

None of the buffs are really game changing, but they do speed up the process, so you can finish up just as quickly as those weird support classes doing the quest in groups, waiting on their healers to drink.  

Some PvP Stat Clarifications


Since I started PvP'ing (even if just casually), I've always struggled with the first season of an expansion.  With no crafted PvP set to get me started, and a few horrible experiences in Ashran right after hitting 100, I pretty much have just been ignoring PvP.  After all, it's not like I haven't had plenty to do to get ready for raiding.

Well I suppose I should have queued for a couple random BGs sooner.  Somehow I missed the implication of getting a chance at a piece of gear; it means people actually have a reason to try in random BGs.  Instead of queuing with half the people in the group just sitting there, tabbed out, slowly grinding out some honor, there is now significant reward from winning (well, at least before conquest gear comes out later today).  And there's another big benefit of the loot boxes system, and that's that even when you're with a horrible team, there's a reason to stay to the end, because even the losing gear has a chance to give you gear that's the same ilvl as the Ashran gear.

I imagine random BGs were mostly fun because they had a lot of great PvPers in them, since there were no RBGs or ranked Arenas open yet.  Still, it was fun while it lasted, and now I'm getting excited to get into RBGs and some Arenas as the season opens.

PvP Stat Changes

I didn't, until last week, know about all of the various changes to stats in Warlords.  I suppose I had heard that there multistrike would work differently, but even that, I was still working with outdated information. Dillypoo mentioned this on Arena Junkies, and over on the Battle.net forums, hunter Mejjmejj recently posted a fairly detailed guide to hunter stats in PvP, and I've since found confirmation of all of these in logs and Dev posts.  

The big changes are that Crits only do 150% damage (instead of the 200% they do in PvE) and Multistrike only has a chance to do 1 additional shot for 30% damage (instead of 2 in PvE). What that means for the stats, is that you'll need more crit or multistrike stats in order to increase your dps by the same amount.  For example, where before (and currently in PvE) you needed 110 crit to raise your overall DPS by 1% (not including its other effects, like focus return), now you need 220 crit to raise your overall DPS by 1%.

So the immediate DPS effects of our basic damage multiplying stats look like this:

110 Crit = + .5% damage
110 MS = +.5% damage
110 Versa = +.85% damage

For Mastery it's going to depend on playstyle (are you focused on all Pet Damage as BM, etc..), but just as an average from a few BG logs, using the same 110 stat as a comparison, my mastery weights looked like this:

BM: 110 Mastery ≈ +1.2% damage
SV: 110 Mastery ≈ + .75% damage
MM:  110 Mastery ≈ + .55% damage (assuming you have 100% uptime on ST)

Based on these numbers, only BM mastery is going to out perform Versatility, especially once you consider the other benefit of Versatility, reduced damage taken.  However, there needs to be an addendum, in that Crit's value isn't only in doing more damage.

For MM hunters, Aimed Shot Crits return 20 focus.  This can be crucial when trying to burst someone down, as getting that extra focus could mean you can cast an additional damage dealing ability before they have time to heal, where as otherwise you might need to use Steady Shot, delaying your big damage dealing abilities, and possibly giving your opponents healer time to catch up.

For BM hunters, Auto Shot crits give your pet 15 focus, do to the Invigoration mechanic (formerly called "Go for the Throat").  This, in turn, can lead to a higher number of Claws, Bites, or Smacks (pet basic attacks) or a greater number of Wild Hunts (which double the damage of your pet's basic attacks).

Both of these mechanics are very difficult to quantify as a "% damage increase", but should still be considered when looking at ideal stats.

Anyhow, we should have some better ideas of Strategy Dependent stat weights as we the new season opens (today!), and hopefully, more info on determining the best gearing strategy for PvP Hunters.